Toolchain: KSDK 1.2.0 with Eclipse 4.4 (Luna) and GNU ARM Plugin
I’m excited to see the recent release of version 1.2.0 of the Software Development Kit for Kinetis MCUs. This now means we can use Eclipse Luna with it. If you are like me who recently started developing on ARM Kinetis devices then you might be pulling out your hair trying to find information on how to get any of it to work, including the basics like how to install the Kinetis SDK on a IDE that won’t break the bank like Eclipse. I prefer to use Eclipse over Kinetis Design Studio because I want to develop applications for other MCU providers like STMicroelectronics or Texus Instruments. I started with KSDK 1.1 which only worked on Eclipse Kepler which I found out the hard way. Its important to note that this post may only work on Eclipse Luna and not future versions. The only post at the time I could find that explained how to set all this up was using KSDK 1.0 (Constructing a Classroom IDE with Eclipse for ARM), its a good post that was vital to understand but it needs an update and that’s what I’m attempting to do here.
Overview:
- Install Java Runtime Environment (JRE)
- Install Eclipse 4.4 (Luna)
- Install Kinetis Processor Expert Software
- Install Kinetis SDK 1.2.0
- Install GCC for ARM Embedded Processors
- Build tools (make & rm) for Windows
- Install GNU ARM Eclipse Plugins
- Setting Eclipse workspace preferences
- Other recommended tools
Install Java Runtime Environment (JRE)
Eclipse is a Java based application and requires that you either have Java Runtime Environment installed (JRE) or Java Development Kit installed (JDK). If you already have one of these installed then you can skip to the next section. This blog assumes you are not doing any Java development so the following steps cover installing a version of JRE that can be used with the version of Eclipse installed.
Step 1. Download the JRE from: http://www.oracle.com/technetwork/java/javase/downloads/jre8-downloads-2133155.html, download the exe version instead of the tar.gz
Step 2. Run the downloaded exe.
Step 3. A welcome screen is displayed, click the Install button.
Step 4. It should install and once complete it should display a message saying “You have successfully installed Java”. Click the close button.
Install Eclipse 4.4 (Luna)
Step 1. Download Eclipse (Luna) from: http://www.eclipse.org/downloads/packages/eclipse-ide-cc-developers/lunasr2
Step 2. Extract the downloaded zip file. You can extract Eclipse to any folder location and it will still work but I prefer to extract it to “C:\Program Files” where most other applications reside. This applies for both x64 and x86 versions of Windows. After the extract Program files should now contain a folder called eclipse and the path to eclipse.exe should now be at “C:\Program Files\eclipse\eclipse.exe”.
Step 3. At this point I like to create a shortcut to the exe. Open up file explorer, navigate to the path “C:\Program Files\eclipse\”, right mouse click on eclipse.exe and select “Pin to start” or “Pin to taskbar” or both.
Step 4. If you created a shortcut, then click on the shortcut to run Eclipse, otherwise open file explorer, navigate to “C:\Program Files\eclipse\” and run the eclipse.exe.
Step 5. Set a workspace area where all your projects will be saved and click OK button.
Install Kinetis Processor Expert Software
KSDK 1.2.0 on Eclipse Luna requires PEx-KINETIS-v3.0-PLUGIN-ECLIPSE_4.4 (REV 3.0.0) is installed.
Step 1. Download PEx-KINETIS-v3.0-PLUGIN-ECLIPSE_4.4 (REV 3.0.0) from: https://www.freescale.com/webapp/Download?colCode=PEx-KINETIS-PLUGIN-ECLIPSE_4-4&appType=license&location=null&fpsp=1&WT_TYPE=Embedded%20Components&WT_VENDOR=FREESCALE&WT_FILE_FORMAT=zip&WT_ASSET=Downloads&fileExt=.zip&Parent_nodeId=1310405628018705856814&Parent_pageType=product
You may have to sign into the freescale site first or register for an account on the freescale site.
You may be asked to accept terms and conditions on the download page, click on the accept button to begin the download.
Step 2. Unzip the downloaded file “PEx_for_Kinetis_3.0.0_Install_into_Eclipse_4.4_Unzip_me.zip” to any location.
Step 3. Open Eclipse, in the top menu select “Help” and then “Install New Software…”
Step 4. Click the “Add” button next to the “Work with:” drop down box.
Step 5. Click the “Archive…” button
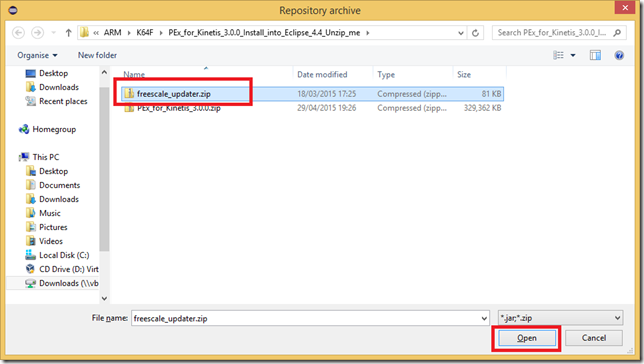
Step 6. Navigate to the folder where you unzipped the file “PEx_for_Kinetis_3.0.0_Install_into_Eclipse_4.4_Unzip_me.zip” to. Select the file “freescale_updater.zip” and click on the “Open” button.
Step 7. Fill in the name field, it can be anything but I use “PE Freescale updater”. Click the “OK” button.
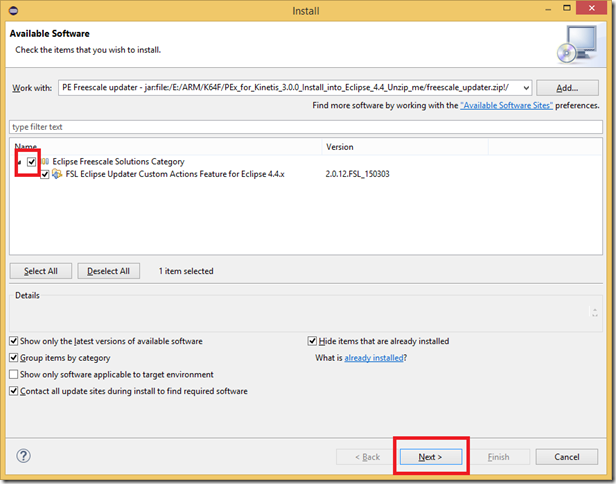
Step 8. Back on the Install Form, check the checkbox next to “Eclipse Freescale Solutions Category”. Click Next.
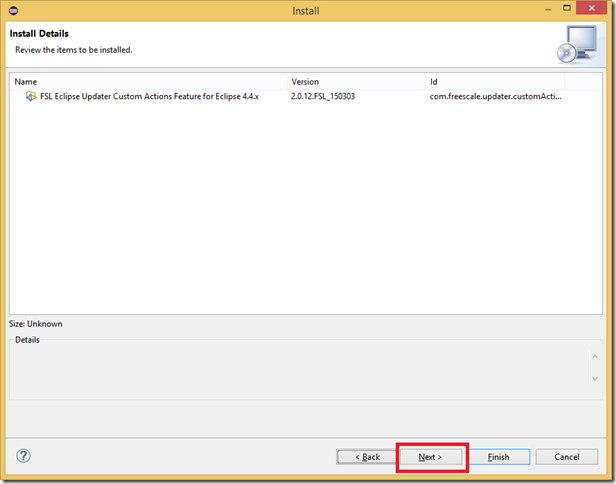
Step 9. Click Next again.
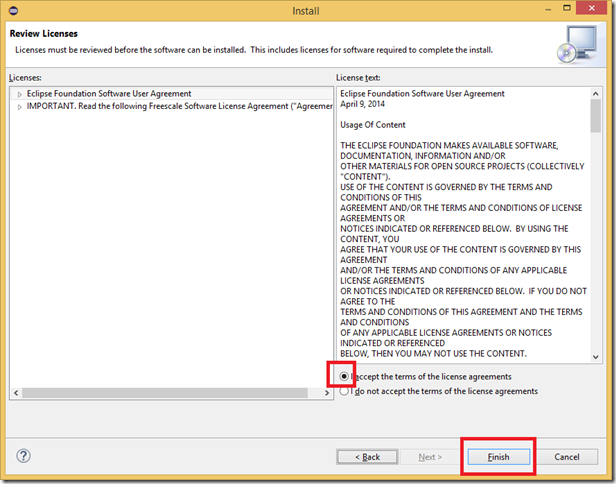
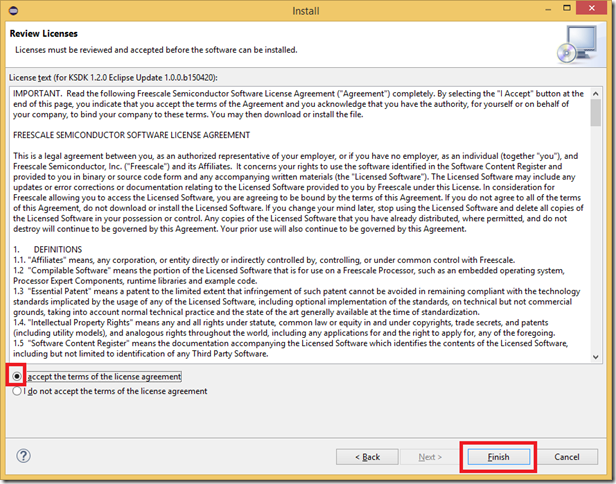
Step 10. Check the radio button “I accept the terms of the licence agreements”. Click Finish.
Step 11. It may then ask you if you trust a certificate. Click on the “Select All” button and then click the “OK”.
Step 12. When the installation finishes, it will ask you to restart Eclipse. Click on the “Yes” button.
Step 13. Wait for eclipse to restart, if it does not restart for any reason, make sure it has closed, then reopen it. Then in the top menu select “Help” and then “Install New Software…” again.
Step 14. Click the “Add” button next to the “Work with:” drop down box again.
Step 15. Click the “Archive…” button again
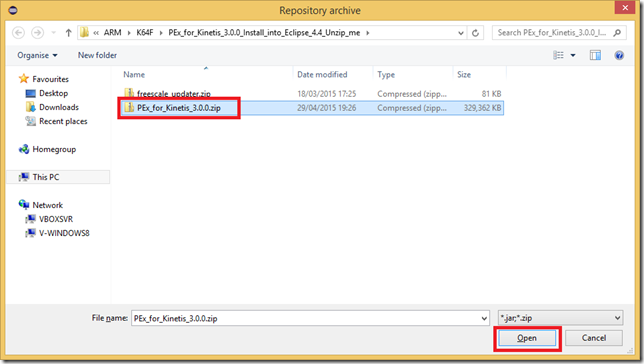
Step 16. Navigate to the folder where you unzipped the file “PEx_for_Kinetis_3.0.0_Install_into_Eclipse_4.4_Unzip_me.zip” to again. This time select the file “PEx_for_Kinetis_3.0.0.zip” and click on the “Open” button.
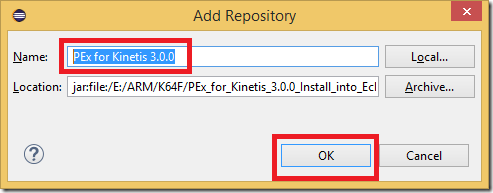
Step 17. Fill in the name field, it can be anything but I use “PEx for Kinetis 3.0.0”. Click the “OK” button.
Step 18. Back on the Install Form, check the checkbox next to “Processor Expert for Kinetis 3.0.0”. Click Next.
Step 19. Click Next again.
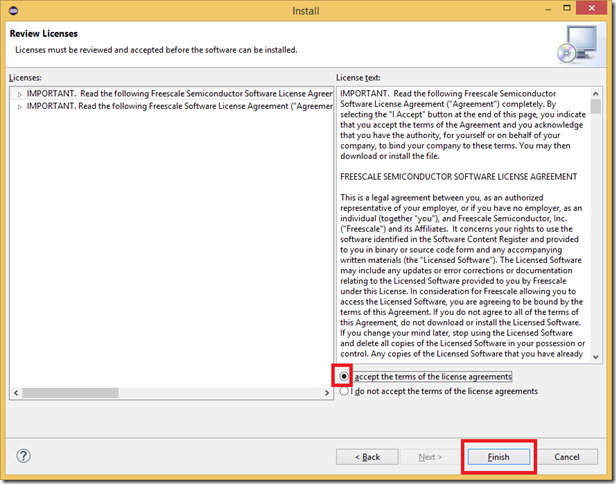
Step 20. Check the radio button “I accept the terms of the licence agreements”. Click Finish.
Step 21. When the installation finishes, it will ask you to restart Eclipse. Click on the “Yes” button.
Install Kinetis SDK 1.2.0
Step 1. Download PEx-KINETIS-v3.0-PLUGIN-ECLIPSE_4.4 (REV 3.0.0) from: https://freescaleesd.flexnetoperations.com/337170/397/8806397/Kinetis%20SDK%201.2.0%20Mainline%20-%20Windows.exe?ftpRequestID=3493503477&server=freescaleesd.flexnetoperations.com&dtm=DTM20150514175928NDgxNTUxODcz&authparam=1431651568_352fe3f0cafc24ce5ea2906ae405bc9b&ext=.exe
You may be asked to accept terms and conditions on the download page, click on the accept button to begin the download.
Step 2. Run the downloaded file “Kinetis SDK 1.2.0 Mainline – Windows.exe”
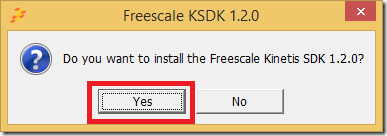
Step 3. Click the “Yes” button on the do you want to install the KSDK 1.2.0 form.
Step 4. I’d leave the installation path as default and click on the “OK” button. N.B. Take note of the path, you will need to know this path for workspace and project settings which I explain further down in this blog.
Step 5. This will now extract files to the folder path you provided. Once installation is complete, click on the “OK” button.
Step 6. Now we need to install the SDK into Eclipse, Open up Eclipse, in the top menu select “Help” and then “Install New Software…”
Step 7. Click the “Add” button next to the “Work with:” drop down box.
Step 8. Click the “Archive…” button
Step 9. Navigate to the folder where you installed the KSDK to. If you used the default path then this would be “C:\Freescale\KSDK_1.2.0\”. Go into the “Tools” folder and then into the “eclipse_update” folder. The end path you should have navigated may look something like “C:\Freescale\KSDK_1.2.0\tools\eclipse_update”. Select the file “KSDK_1.2.0_Eclipse_Update.zip” and click on the “Open” button.
Step 10. Fill in the name field, it can be anything but I use “KSDK 1.2.0”. Click the “OK” button.
Step 11. Back on the Install Form, check the checkbox next to “KSDK 1.2.0 Eclipse Update”. Click Next.
Step 12. Click Next again.
Step 13. Check the radio button “I accept the terms of the licence agreements”. Click Finish.
Step 14. When the installation finishes, it will ask you to restart Eclipse. Click on the “Yes” button.
Once it has restarted you should see Processor Expert update its list of supported processors.
At this point you are able to create Kinetis projects in Eclipse but you will need a cross platform compiler to be able to compile your code for your MCU. The next 3 sections will show you how to set this up.
Install GCC for ARM Embedded Processors
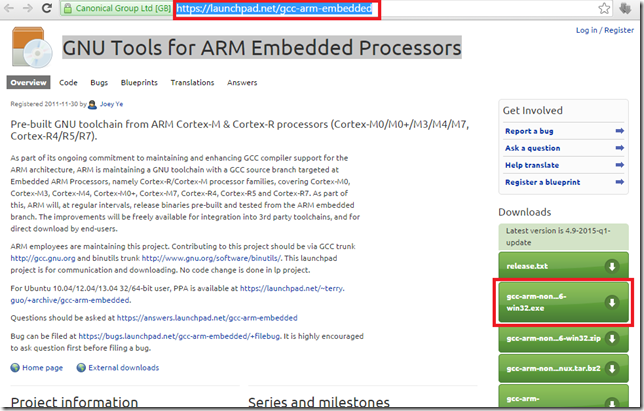
Step 1. In your web browser navigate to the url: https://launchpad.net/gcc-arm-embedded. Download the file with the “.exe” extension.
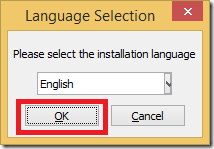
Step 2. Run the downloaded file and click the “OK” button.
Step 3. Click the “Yes” button to continue.
Step 4. Click the “Next” button.
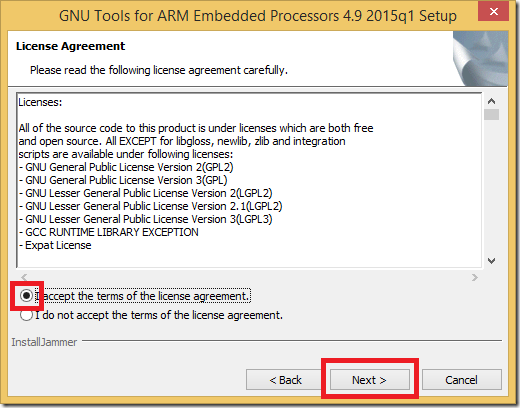
Step 4. Accept the licence agreement and click the “Next” button.
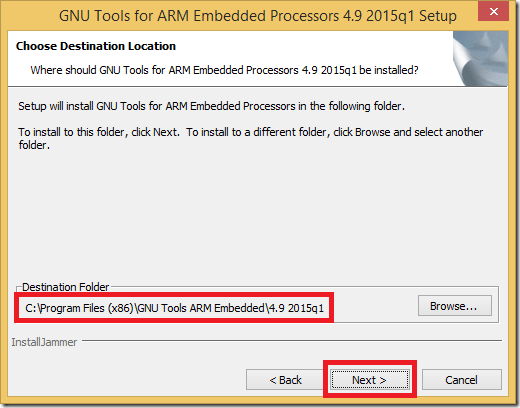
Step 5. The next screen is where the path to the ARM GCC can be installed to. You can install this to any folder you prefer but I leave this as default. N.B. Take note of the path where you are installing to. You will need this to set preferences within Eclipse.
Step 6. Click the “Next” button.
Step 7. Once installation is complete and you get the Installation Wizard Complete form, make sure the checkbox “Add path to environment variable” is NOT checked. You can uncheck the other checkboxes as well and click the “Finish” button.
Build tools (make & rm) for Windows
The following package installs additional tools for building needed on Windows “make.exe” and “rm.exe”. On Linux and OS X these tools are part of the standard distribution of the operating system. The package is supplied by the “GNU ARM Eclipse” project which provides some great tools for ARM development using Eclipse.
Step 1. Download the latest version of the file gnuarmeclipse-build-tools-win32-2.*-*-setup.exe at http://sourceforge.net/projects/gnuarmeclipse/files/Build%20Tools/
Step 2. Run the downloaded file and click the “OK” button.
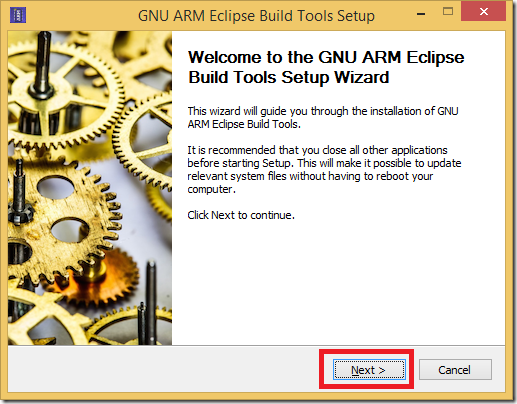
Step 3. Click the “Next” button.
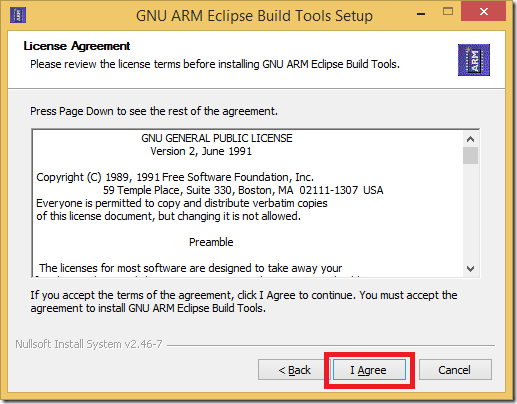
Step 4. Click on the “I Agree” button.
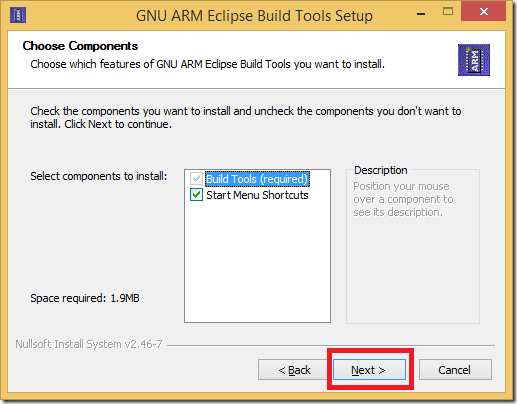
Step 5. Click the “Next” button.
Step 6. The next screen is where the path to the build tools can be installed to. You can install this to any folder you prefer but I leave this as default. N.B. Take note of the path where you are installing to. You will need this to set preferences within Eclipse. Click on the “Install” button.
Step 7. Click the “Finish” button.
Install GNU ARM Eclipse Plugins
Now we need to add a plugin into Eclipse to make the tools installed available in Eclipse. We are going to add a plugin also supplied by the “GNU ARM Eclipse” project.
Step 1. Open Eclipse if not already open. In the top menu select “Help” and then “Install New Software…”
Step 2. Click the “Add” button next to the “Work with:” drop down box.
Step 3. This time do NOT click the archive button, simply fill in the name field with “GNU ARM Eclipse Plug-ins”, in the value field fill in “http://gnuarmeclipse.sourceforge.net/updates” and click the “OK” button.
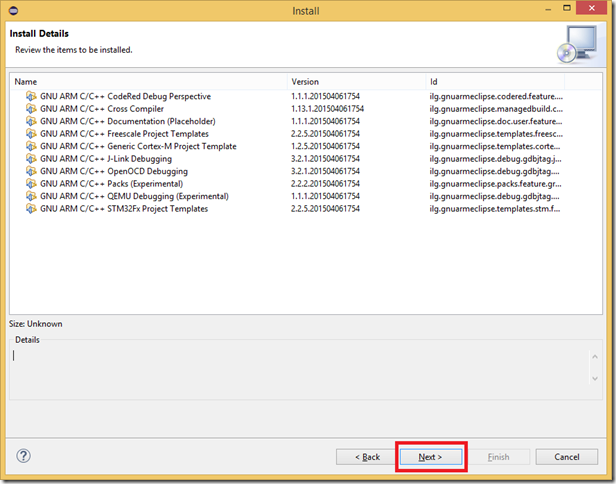
Step 4. Back on the Install Form, check the checkbox next to “GNU ARM C/C++ Cross Development Tools”. Click Next.
Step 9. Click Next again.
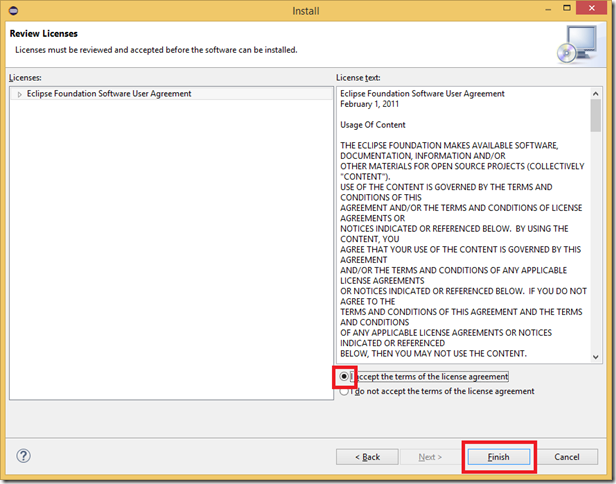
Step 10. Check the radio button “I accept the terms of the licence agreements”. Click Finish.
Step 11. It may then ask you if you trust a certificate. Click on the “OK” button.
Step 12. When the installation finishes, it will ask you to restart Eclipse. Click on the “Yes” button.
Setting Eclipse workspace preferences
At this point we will set Eclipse preferences to map to all the tools installed. Open up Eclipse if its not open already.
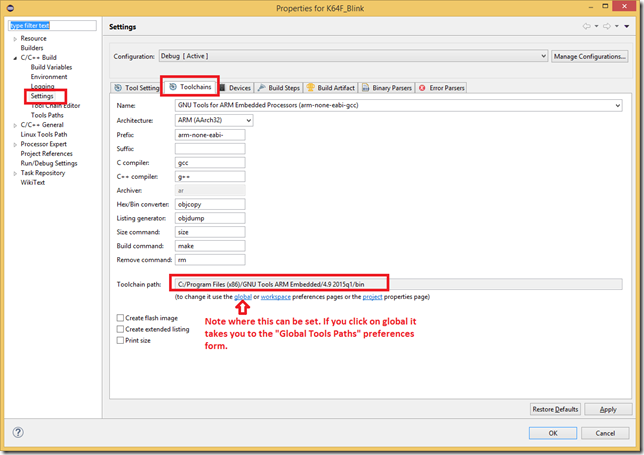
1. Set Global Tools Paths: On top menu within Eclipse, click “Window”, then select “Preferences”. In Preferences form on the left hand menu expand “C/C++”, then “Build”, then “Global Tools Paths”. Make sure the field “Build tools folder” is set to point to the bin folder under where you installed Build tools (make & rm) for Windows. If you used the default then this would be “C:/Program Files (x86)/GNU ARM Eclipse/Build Tools/2.4-201503242026/bin”. Make sure the field “Default toolchain” is set to “GNU Tools for ARM Embedded Processors”. Make sure the field “Toolchain folder” is set to the bin folder under where you installed GCC for ARM Embedded Processors. If you kept the default then this would be “C:\Program Files (x86)\GNU Tools ARM Embedded\4.9 2015q1\bin”. Note, you could try clicking on the “Restore Defaults” button which may set it to these values for you.
This gets used on project settings under build settings, Toolchains:
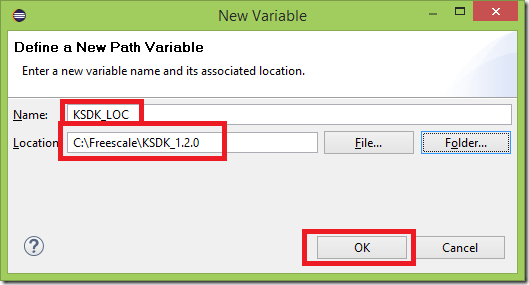
2. Set Linked Resource KSDK_LOC: In the preferences form on the left hand side menu expand “General”, then “Workspace”, then select “Linked Resources”. Add a new variable with the name “KSDK_LOC” and the value pointing to the folder where you installed Kinetis SDK 1.2.0. If you kept the default location then this value would be “C:\Freescale\KSDK_1.2.0”.
This can be used when adding new files to a project that should link to the Kinetis SDK.
Once complete its a good idea to export your settings so you can import them later again if you need to rebuild your installation of Eclipse and KSDK. To do so you can follow the steps in the blog: “Copy my workspace settings“.
Other recommended tools
You should now be able to code and compile Kinetis projects using KSDK 1.2.0 on Eclipse. Congratulations but most kinetis development boards now days use OpenSDAv2 and so you likely need to setup Segger J-Link to be able to upload your project onto your controller and debug. I will not go into details here how to set all that up but the basics are:
1. Follow details on https://www.segger.com/opensda.html. Make sure you have installed both the J-Link software package and read and perform the correct install of the Firmware noted in the last section of the site under “Firmware images”.
2. Follow the instruction on http://gnuarmeclipse.livius.net/blog/jlink-debugging/. Make sure you have performed the “J-Link Install” part of this site and followed the details under the section “J-Link plug-in usage”.
That’s it. If you managed to follow all these steps correctly then you should be up and running now creating some amazing projects. Good luck, hope this blog helped you out.


















Note for those interested. I have tested these steps on Eclipse MARS and it works as well although I downloaded the latest versions of plugins, sdk and build tools. I’d recommend also taking a look at Erich Styger’s post:
and a another useful tool called LaunchBar Erich also posted a blog on at:
Hi Centaurian,
Great simple instructions: I always like those simple instructions using screendump which is a pain to compile/compose.
One question: will I be able to debug the target by setting breakpoints and am I able to variable values etc (the standard debugging in Eclipse) ??? Or is a JTAG breakout required?
Thanks
woops: forgot to check follow or email notification
Thanks for the comments. Yes you should be able to use breakpoints and set variable values but the Open SDA version of the Segger J-link only licences you to be able to use 5 breakpoints. If you want to use more you will need to purchase an additional licence or buy an external Segger J-Link debugger. Note that using an external J-Link will be connected to the 10 pin SWD header on the top of the board and this will not work unless you cut the J8 jumper trace on the board bottom side. I have done this myself and it works. You can see more about external debugger here https://developer.mbed.org/questions/4658/FRDM-K64F-alternative-JTAG-Debugger/
Are there Open Source alternatives instead of using this commercial Segger J_Link debugger?
The FRDM K64F board uses a built in debugger using OpenSDA which is open source. Segger and PE Multilink both provide drivers so you can debug the board using their software via OpenSDA. Haven’t used PE Multilink but the segger software is free to use but has few restrictions like number of debug break points. This has never been much of a problem for me. The only reason I bought and use a full fledged J-link probe is for creating my custom board so far. I’d recommend using the built in FRDM built in debugger and then use Segger’s driver for OpenSDA or PE multilink’s driver for OpenSDA until you get to a point where you simply can’t live without the need for full fledged probe. I bet you will get very far before you ever need it.